
Cool equipment: CTOUCH Laser Air

The Dutch brand CTOUCH belongs to the premium segment when it comes to interactive equipment – not only in the ViDiS offer, but also from the perspective of the global market.
The company is one of the first in Europe in terms of large-scale sales of interactive displays. Series such as Leddura and Leddura XT were (and are!) not only brilliantly designed, but at the time of their launch they set new standards among touchscreens. Today, when there are many brands on the market, CTOUCH stands out primarily for its very high build quality and innovation in implementing new features.
The same goes for the new Laser Air series, which although announced by CTOUCH as an economy line, still stands out on the market for its advanced functionality. It’s almost scary to think what the new Leddura XTS and Lexinus series, due to debut next year, will bring 😉
Let’s stick, however, to the Laser Air and the unique functionalities it offers. Below we present several features and how to configure them. These mainly concern the built-in Android module, which is slowly becoming standard in interactive displays. Enjoy!
Built-in Android and installing applications
An interactive Android module built into an interactive display is no longer surprising. However, it is worth noting that the overwhelming majority of devices that have this module do not provide the ability to install your own applications. Why is something that is a common daily occurrence for smartphone and tablet users so rare in interactive displays? Well, most manufacturers have blocked this feature due to the potential slowing down of the display’s performance and due to older versions of Android that are usually pre-installed. As a result, most solutions on the market lack access to the Play Store with applications and do not have the ability to install applications using .apk files.
And this is where the advantage of CTOUCH with the Laser Air series comes in, on which we can install applications without much difficulty. How to do it? Laser Air does not have the Play Store, but provides an alternative in the form of APK installer. This feature allows you to easily install any application using an installation file with the .apk extension (what is this?). It is worth emphasizing that most developers easily provide .apk files for their applications. Once we have the .apk file of our application – how to install it on Laser Air?
- Upload the file to a USB flash drive or download it from the network using the built-in browser. Note – applications associated with the Play Store (most from Google) will not work.
- Using the ES File Explorer file browser or directly from the download list, launch the apk file. You can also use the APK Installer application, indicate the file location and go through the short installation process.
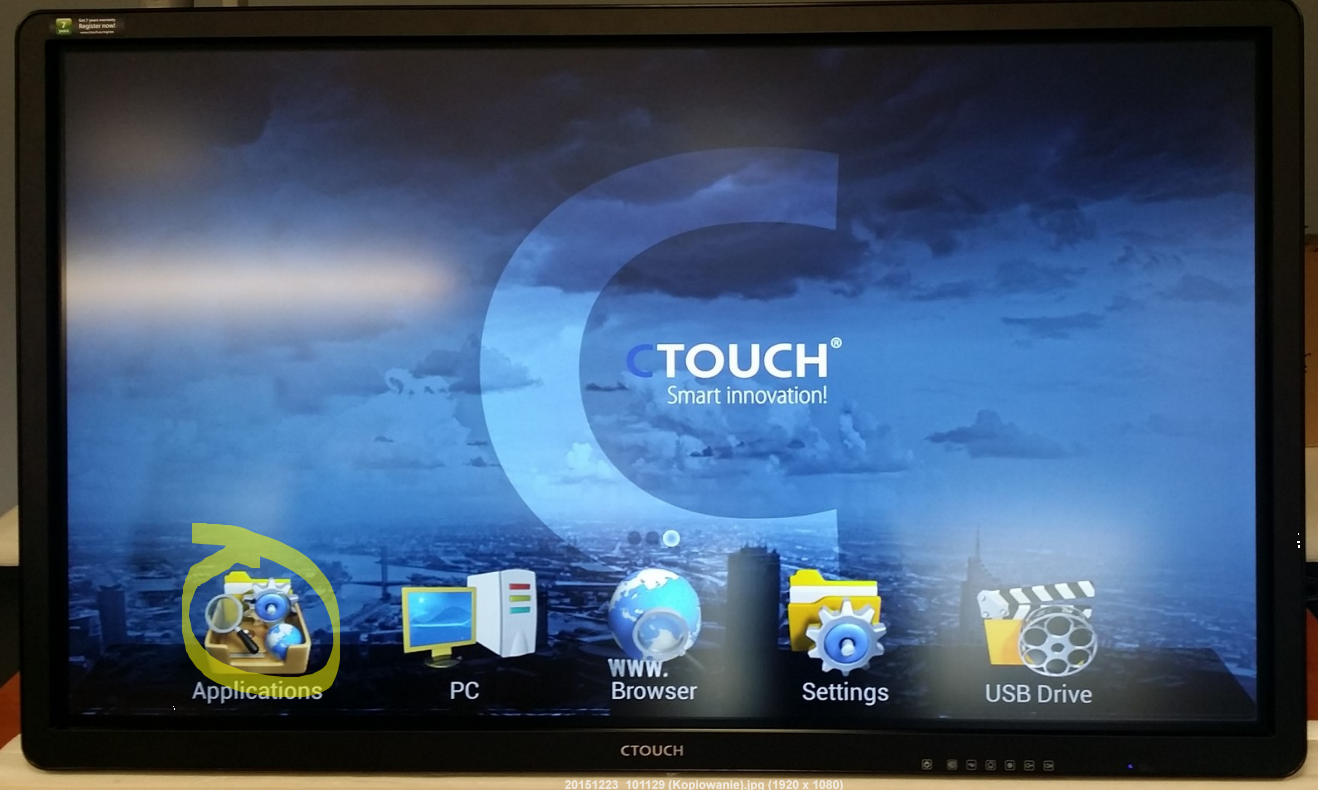
From the home screen, go to applications.
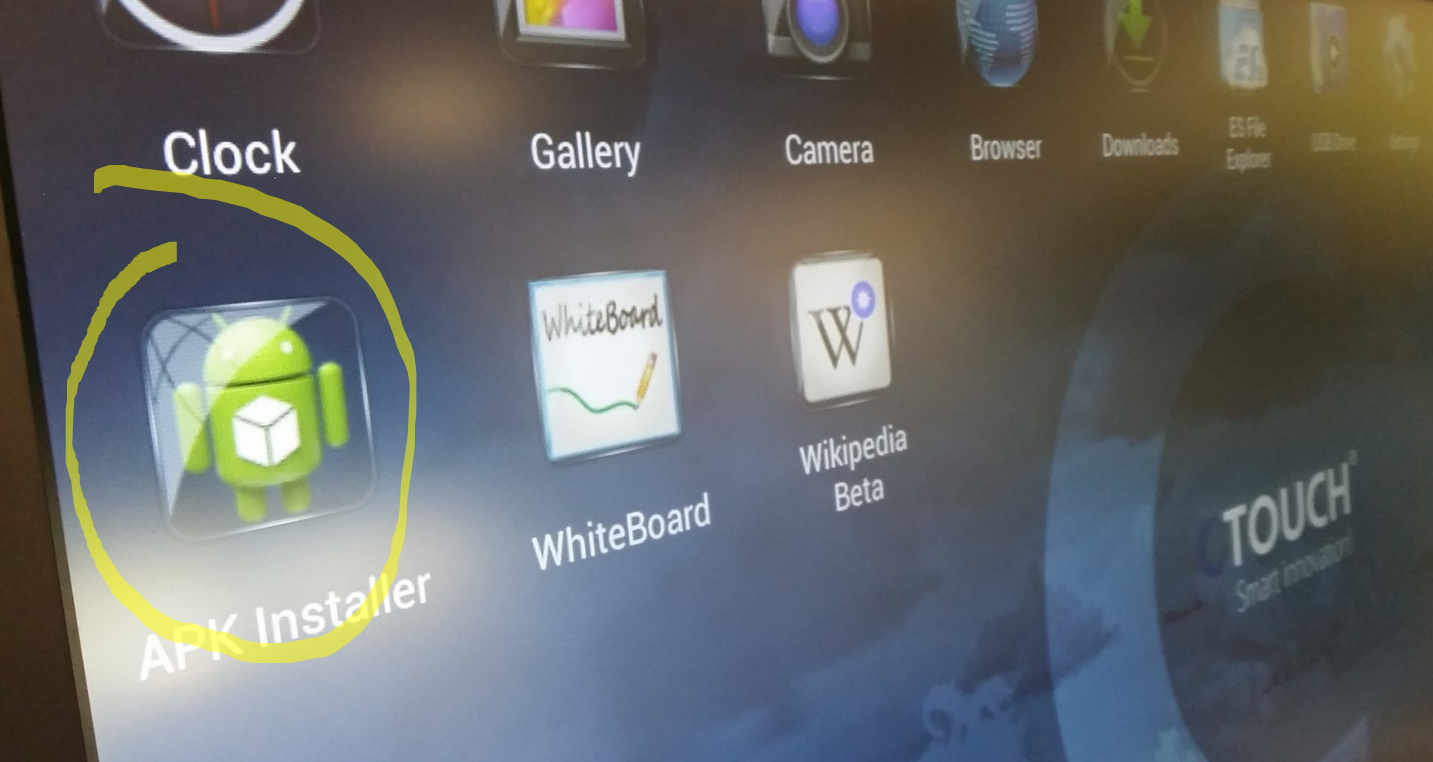
Launch APK Installer.
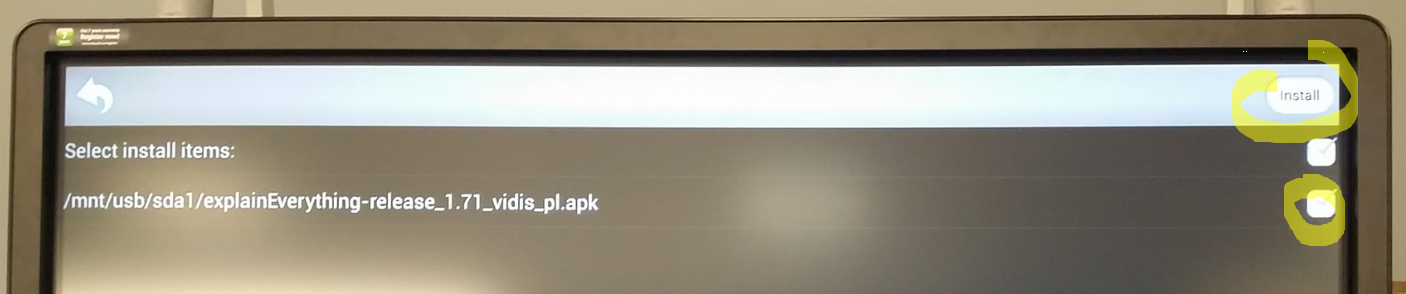
If the .apk file is on a connected USB drive, APK Installer will automatically detect its presence. All we have to do is check the application (checkbox) and click Install.
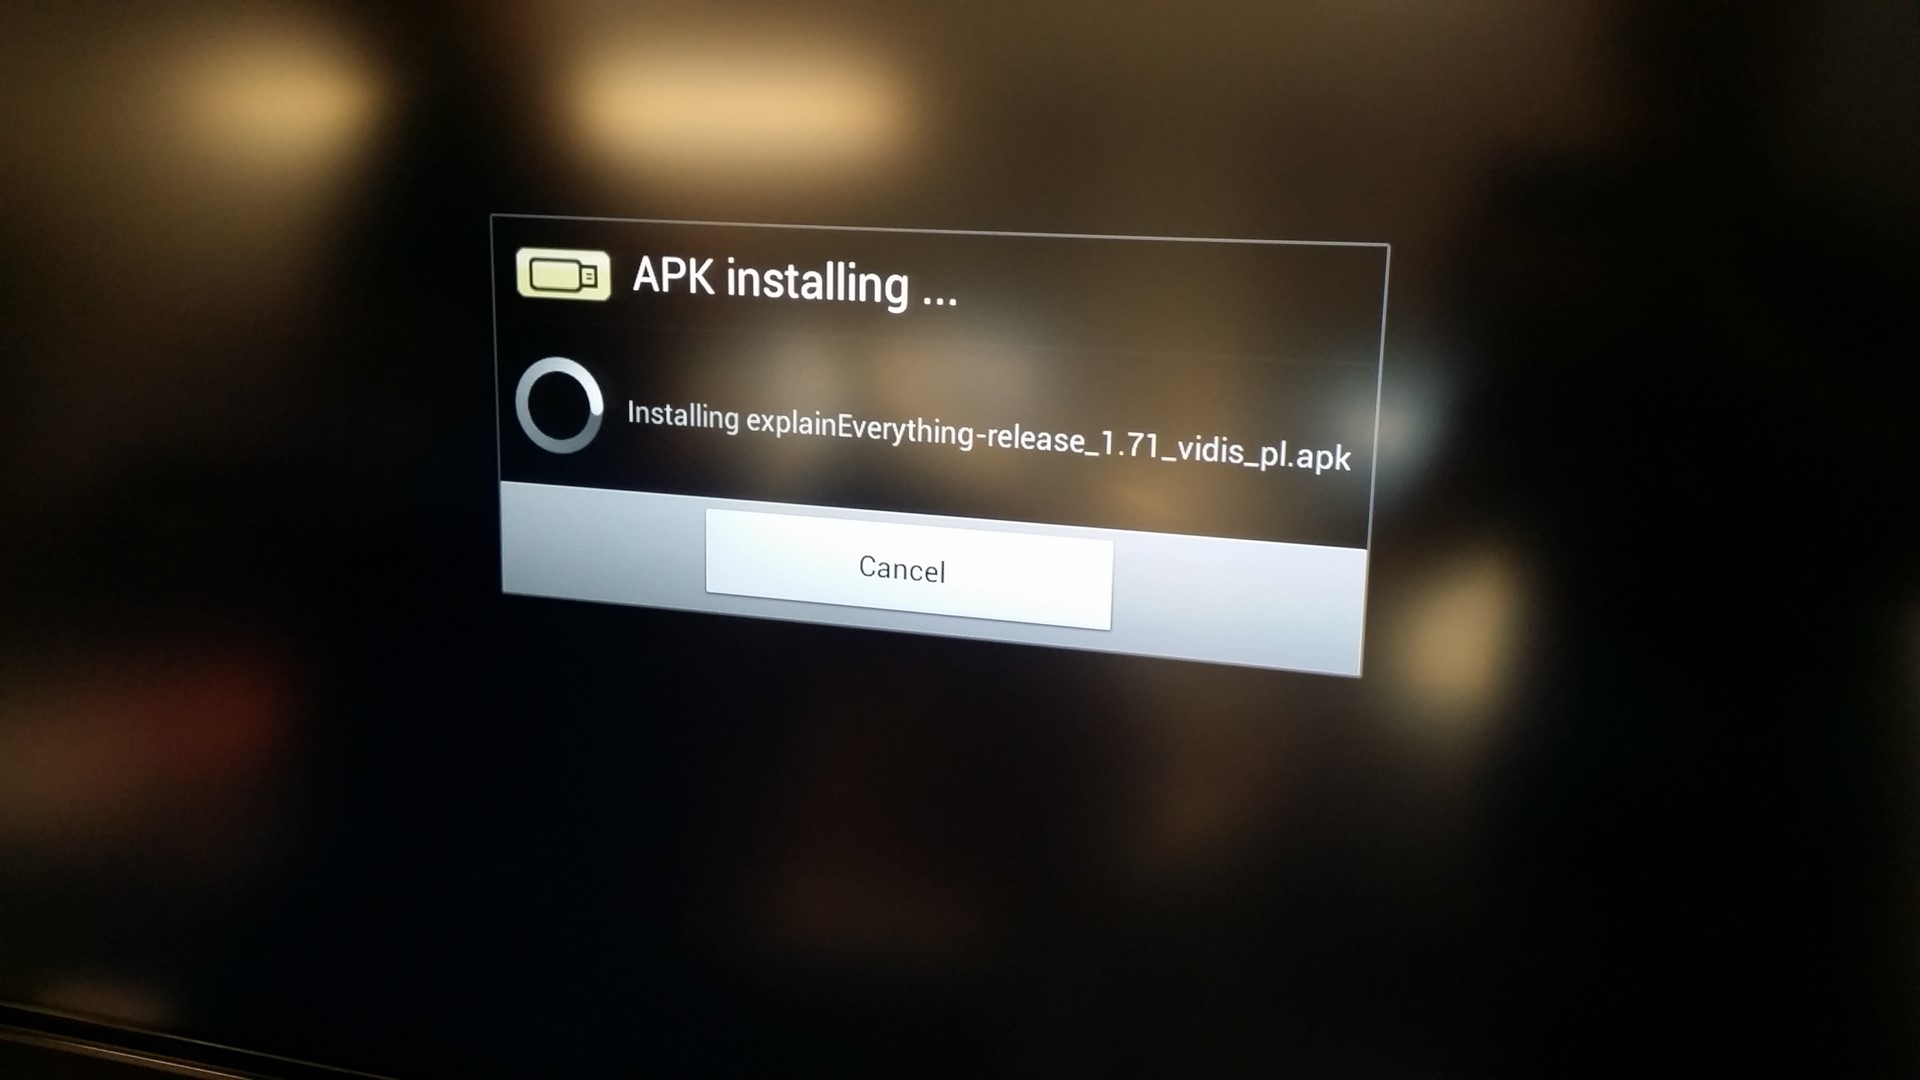
The installation process, at the end of which we click the Done button.
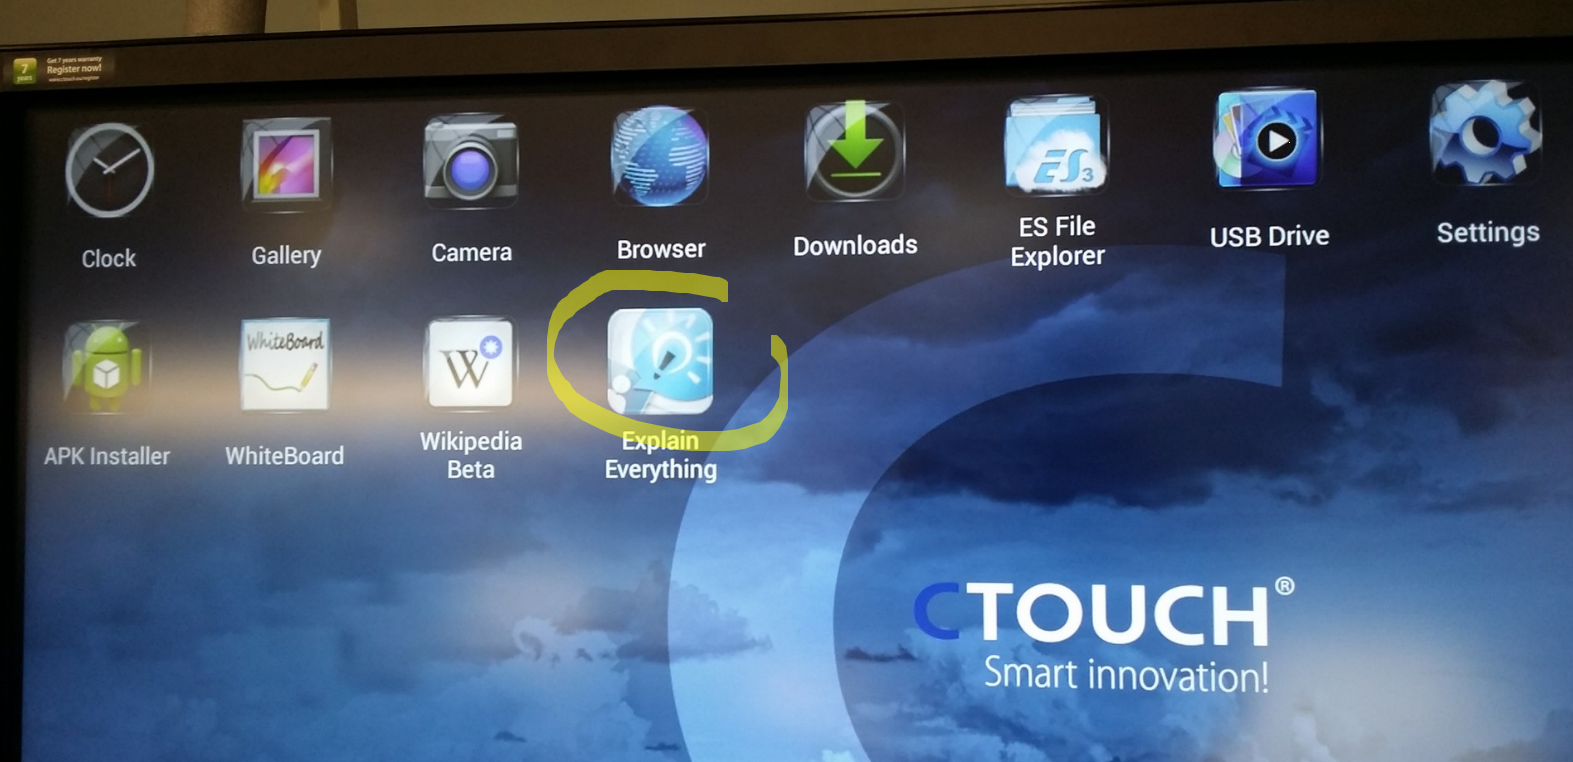
… launch the application from the application list!
Wi-Fi module
One of the biggest novelties (if not the most important) is the expanded networking capabilities. Standard Android modules built into interactive displays overwhelmingly require a network cable connection to be able to browse the web. CTOUCH has once again shown initiative and built a Wi-Fi module into the Laser Air series – thanks to which we can easily connect to the local wireless network and from the level of Android we will be able to enjoy the internet.
How to connect to an existing network?
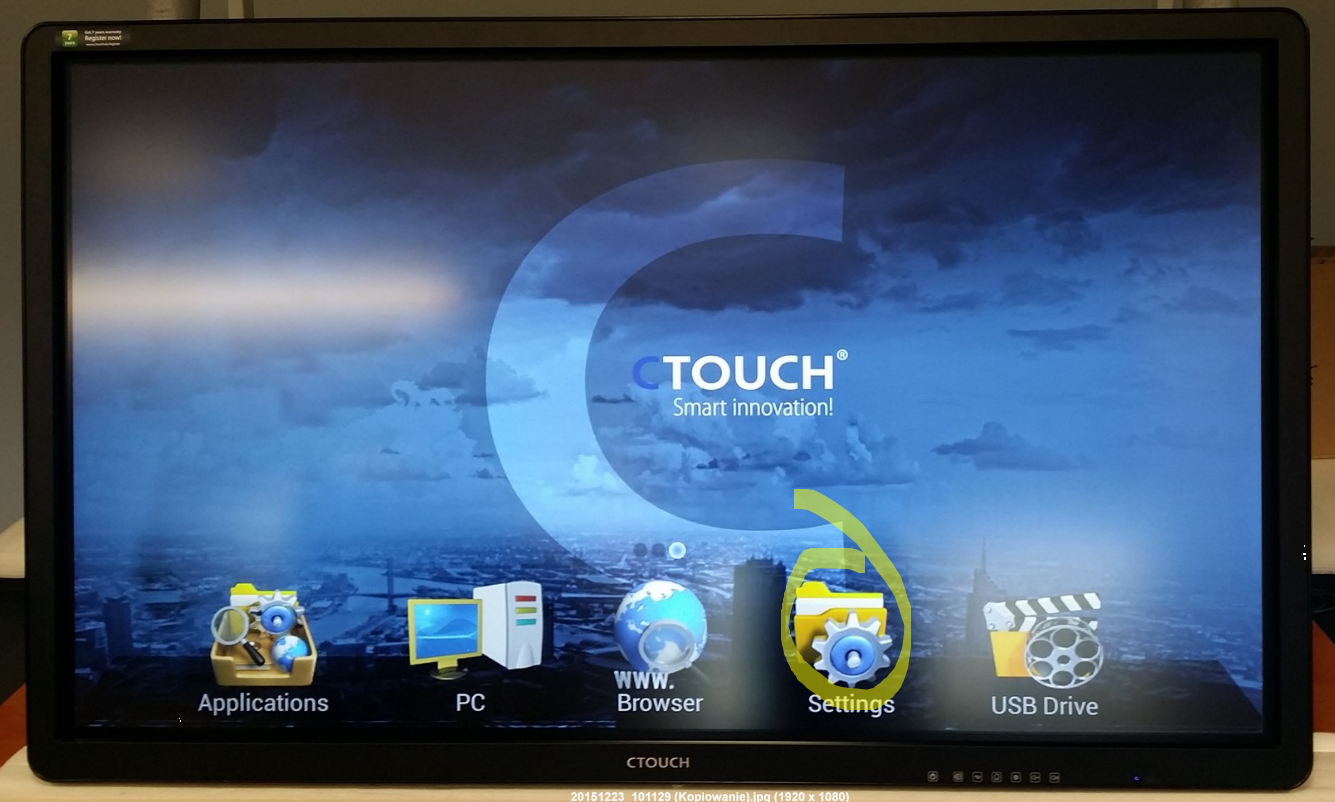
1. Go to options (Settings)
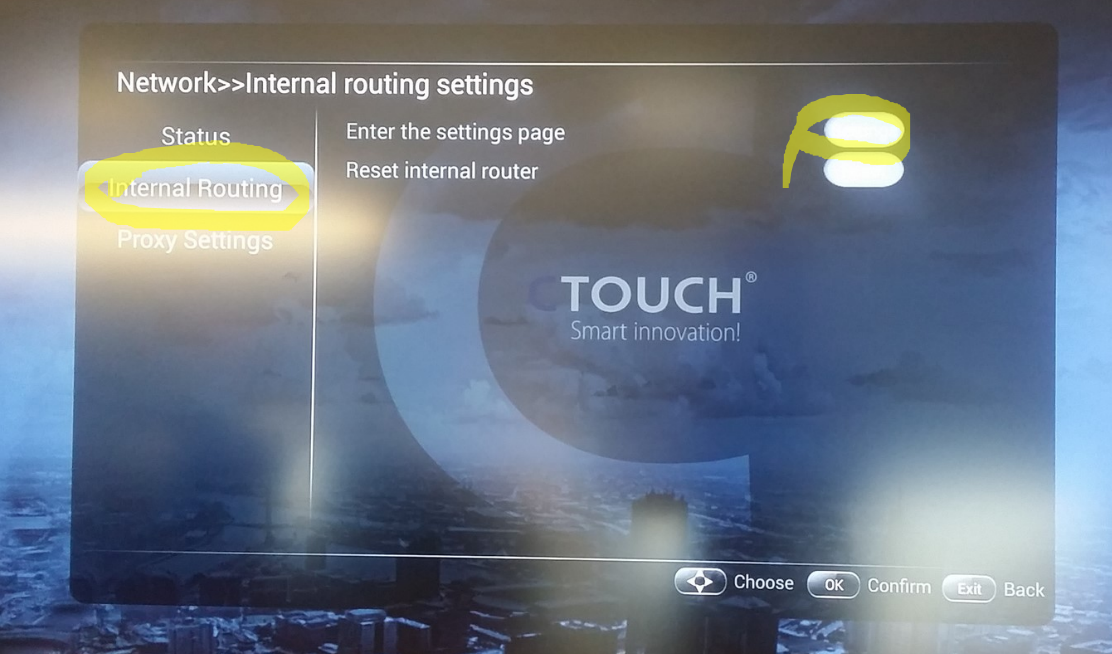
2. From the left menu select Internal routing, then in the row Enter the setting page – click the Settings button
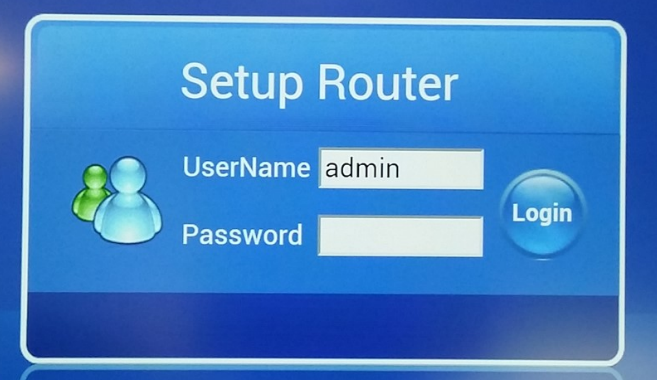
3. Hack the administrator panel by entering the default settings: Admin in the UserName field and leave the Password field empty. Click Login.
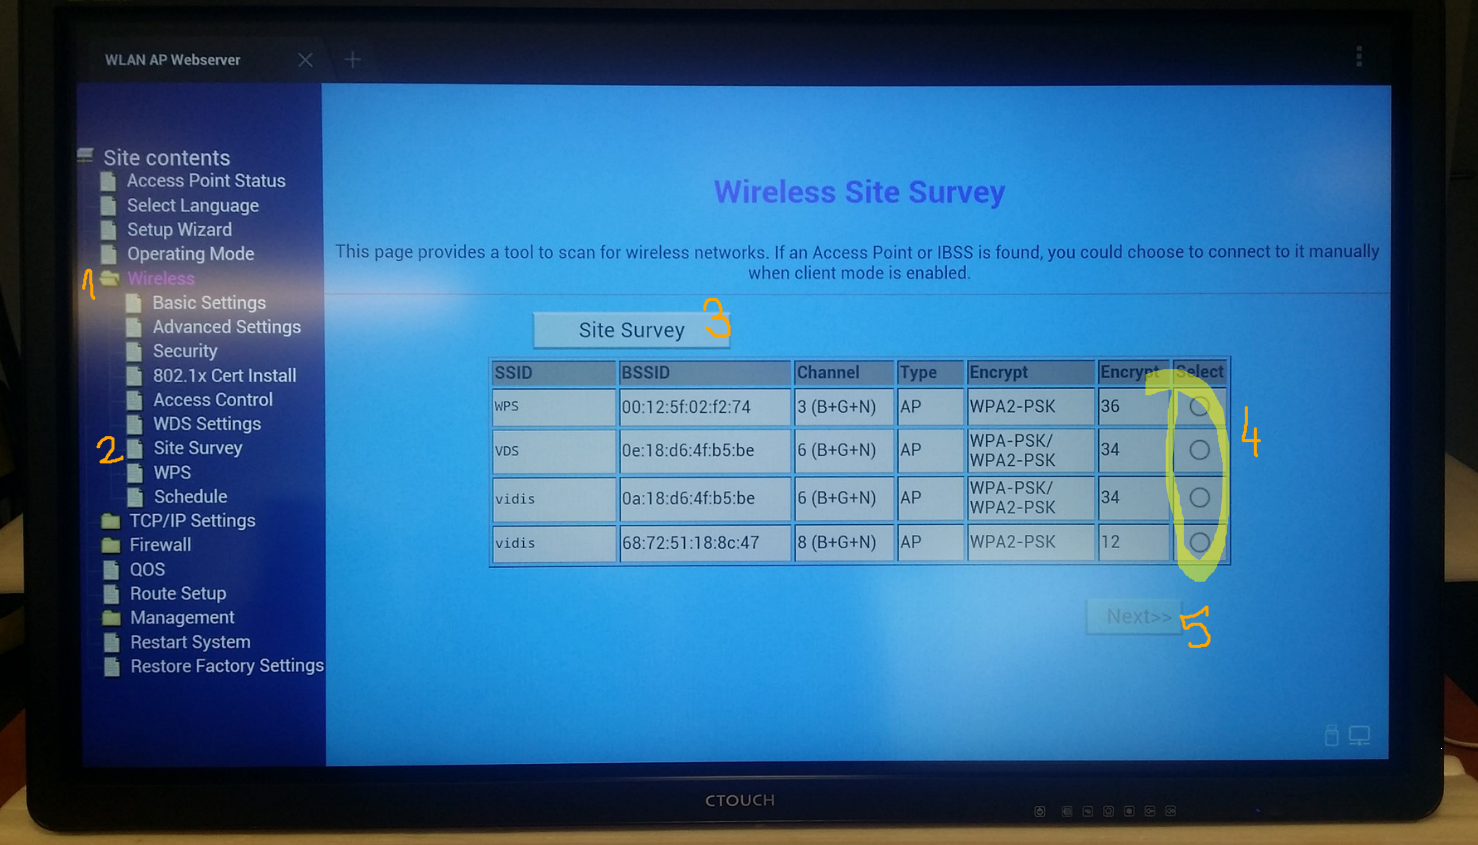
4. We are in the network management panel, go to the Wireless tab (1), and then Site Survey (2). To display the list of available networks, press the Site Survey button (3). From the list, select the network we are interested in (4) and proceed to configuration (5).
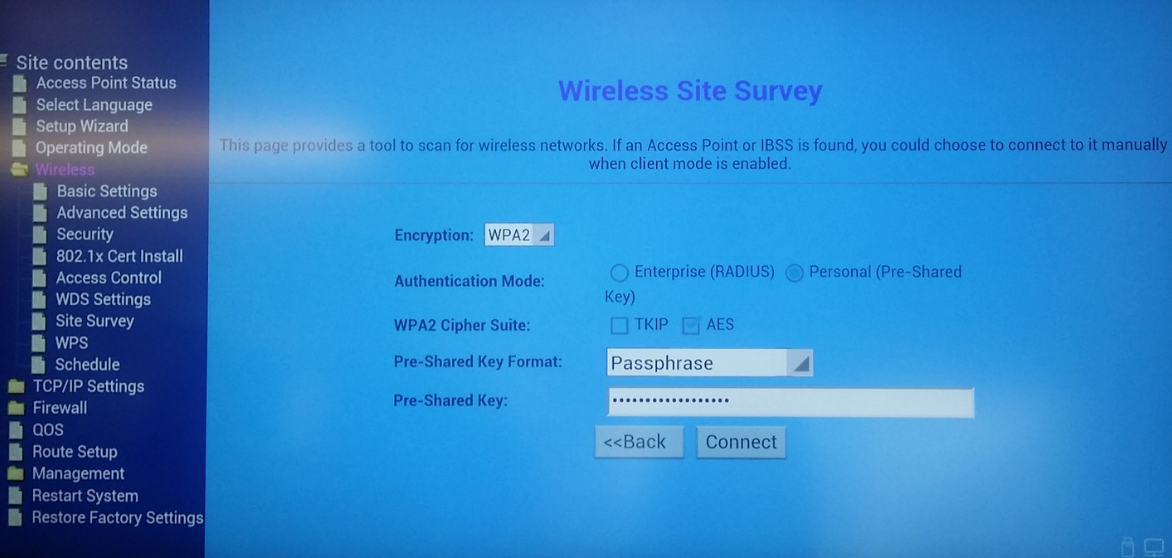
5. Enter the password, click Connect. After a moment, a message about the need for a restart (reboot) should pop up – we do this and we can already use the internet, e.g. via the browser built into Android or another one that requires network access.
Simple, right? 🙂
Wi-Fi router
A Wi-Fi module is one thing, but what do you say about a built-in Wi-Fi router? Does such a solution make sense? In our opinion, absolutely – just imagine a conference room that is to be equipped with modern interactive equipment, but there is no Wi-Fi network, or there are signal problems.
Thanks to Laser Air – you can kill two birds with one stone – first, we will have a very good interactive display, second (somewhat incidentally) we will be able to share the internet with meeting participants. The idea is very simple, but how effective! Especially since in an increasing number of rooms, applications are used that require communication between devices – e.g. sharing an image. What’s more: we know that CTOUCH hasn’t said its last word on software. According to our information, they are working in the Netherlands on an application that will innovatively use the display to cooperate with tablets precisely thanks to the built-in router. We are waiting with impatience.
Let’s get back to the point though: how to configure the Wi-Fi router? The simplest method, which we strongly recommend, is to use the available network wizard. To launch it, go to the network settings (steps 1-3 from the previous instruction).
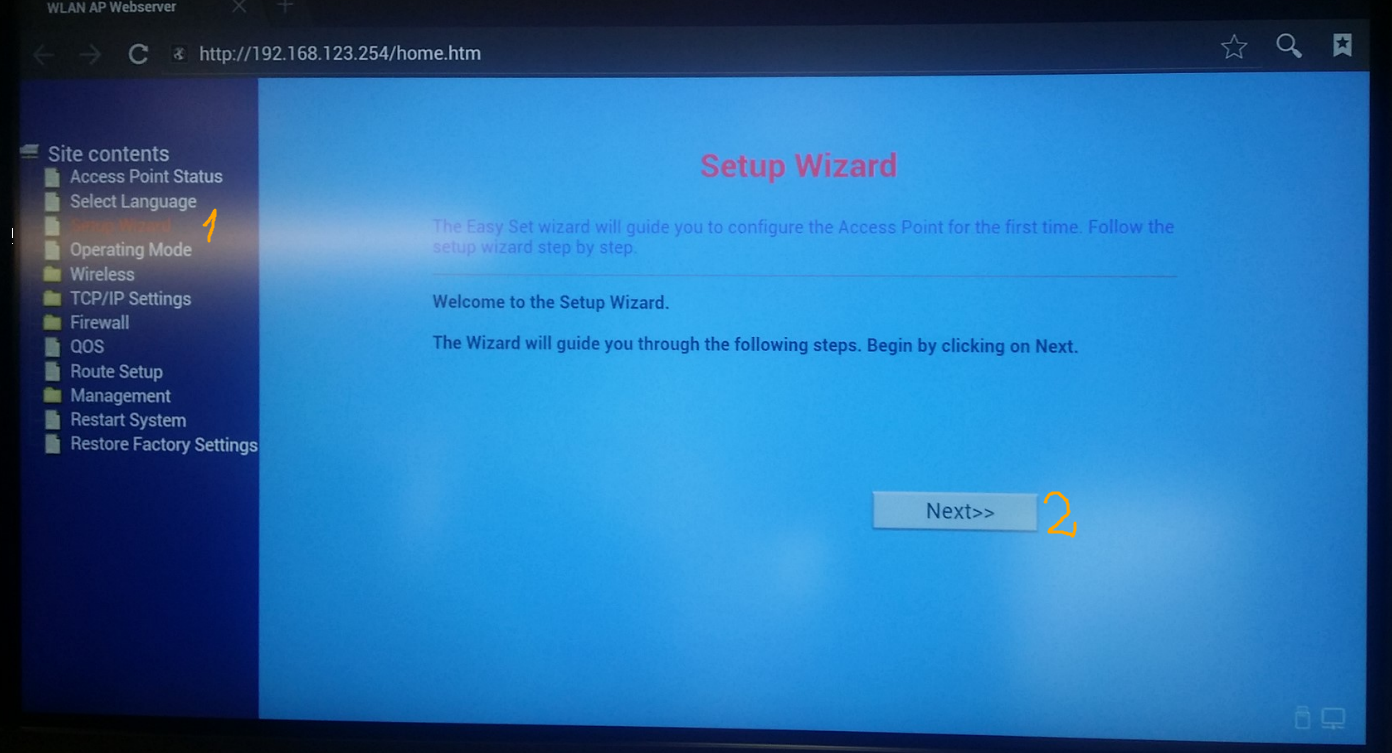
Launch the wizard by going successively: Setup Wizard -> Next
…and start the configuration. The wizard should guide the user clearly through the process of creating a new Wi-Fi network. If anything is unclear – write – we will help!
Let’s also add that both functions described by us can work simultaneously – i.e. we can be connected to an existing Wi-Fi network and at the same time we can create our own network and share it with meeting participants.
To sum up – CTOUCH in terms of displays has once again shown that “you can do more”. The additional options we described are not only useful, but will probably soon be available in displays of other brands. And quite rightly so, because if you’re going to imitate – imitate the best.